En este post te enseñaremos cómo es que puedes instalar Windows 3.1 (un sistema muy viejo) dentro de una máquina virtual, llamada VirtualBox. ¡ENTRA!
INICIAMOS:
Bienvenidos a otro nuevo post. En esta ocasión vengo a enseñarles cómo instalar Windows 3.1, uno de los sistemas más antiguos del mundo, en una máquina virtual llamada VirtualBox, específicamente en su versión 3.0. Esta guía la hice originalmente para un trabajo de la escuela, pero como los quiero mucho, se las voy a compartir. Está SÚPER EXPLICADA, tanto así que hasta creo que un adulto que no sabe de tecnología podría entender cómo instalar Windows 3.1. Así que sin más, ¡vamos al tutorial!
Cómo instalar Windows 3.1 en VirtualBox
Bienvenido a esta guía. Antes de comenzar a instalar Windows 3.1, deberá cerciorarse de tener el programa Sun xVM VirtualBox en su versión 3.0. Puede consultar el siguiente enlace para descargarlo en caso de que no lo tenga.
Deberá también cerciorarse de contener los archivos necesarios para este tutorial.
Los archivos están en formato RAR, que es un formato comprimido. Deberá contar con un programa especial para poder descifrarlos, y a contraseña para descomprimirlos es: mastercoria-win-3-1.
Ahora sí, podemos continuar con con nuestro proceso para instalar Windows 3.1.
Creación de nuestra máquina virtual
Antes de nada, para comenzar a instalar Windows 3.1, empezaremos a crear nuestra máquina virtual:
Paso 1: Abra el programa Sun xVM Virtual Box, que se encontrará en su escritorio del ordenador.
Paso 2: Haga clic en el icono “Nuevo”, ubicado en la parte superior izquierda del programa:
Paso 4: Haga clic en “Siguiente”.
Paso 5: Se le abrirá una ventana. Verá que hay diferentes apartados:
- Nombre: introduzca el nombre del sistema que va a instalar. En este caso, el campo va con “Windows 3.1”.
- Tipo: deje ese apartado como está (en Microsoft Windows).
- Versión: despliegue el menú y elija la opción “Windows 3.1”.
A continuación, dele clic en “Siguiente”.
Paso 6: En la siguiente diapositiva, le pide el tamaño de memoria. Deje el campo por defecto en 32 MB, y a continuación, de clic en “Siguiente”.
Paso 7: Después, seleccione la casilla “Disco Duro de Arranque (Primario Maestro)”, y seleccione la opción “Crear Disco Virtual nuevo”.
Paso 8: Se le abrirá una ventana emergente. Haga clic en “Siguiente”.
Paso 9: Seleccione la opción “Almacenamiento de expansión Dinámica”, y haga clic en “Siguiente”.
Paso 10: Seleccione la ubicación del archivo. Por defecto, ese valor está en “Win95”, pero si desea cambiarla, lo puede hacer. En el campo llamado “Tamaño (S)”, es recomendable establecer el valor entre 1.00 GB y 5 GB, pero dependerá de la tarea a la cual se le asigne ese equipo. Cuando esté listo, haga clic en “Siguiente”.
Paso 11: Haga clic en “Terminar”, después, de igual forma, en “Terminar”.
Paso 12: Se cerrará la ventana. Podrá ver que del lado izquierdo del programa se agregó un nuevo apartado. Selecciónelo.
Paso 13: Después de ello, acceda al apartado de “Configuración” (se encuentra en la parte superior izquierda del programa).
Paso 14: Acceda al submenú “Diskette” (apartado izquierdo de la ventana), y pinche sobre “Montar Unidad de Disquete”.
Paso 15: Seleccione la opción “Image File”, y a continuación, seleccione el icono de carpeta, que se encuentra en la parte derecha de ese apartado.
Paso 16: Haga clic en el icono “Agregar”. Ahora, ubique el archivo “Disk 1.img”, que descargó de los complementos de esta guía (dentro de la carpeta “Windows 3.1” habrá otras dos carpetas, el disco estará dentro de la carpeta “MS-DOS 6.22”), selecciónelo y haga clic en “Abrir”.
Paso 17: Se agregará el archivo. Ahora, haga clic en “Seleccionar”, y a continuación, pinche sobre “Aceptar”.
Paso 18: A continuación, en la parte superior izquierda, haga clic en “Iniciar” (signo de flecha verde). Espere a que cargue el programa.
Paso 19: Verá una pantalla azul. Presione Enter una sola vez (nótese que las indicaciones están igualmente señaladas en la parte inferior de la ventana azul).
Paso 22: A continuación, verá otra pantalla. Vuelva a presionar Enter una sola vez.
Paso 23: Ahora, el asistente le preguntará si usted insertó de manera correcta el disco 1. Si está seguro, presione Enter, de lo contrario, vuelva al paso 14.
Paso 23: Espere. Se está cargando la unidad del disco 1 que agregó anteriormente. Cuando finalice, verá una pantalla que tiene seleccionado un texto que dice “The settings are correct”. Verifique que las 3 opciones superiores a ese texto están correctos. El apartado “Date/Time” especifica la fecha y hora; el apartado “Country” especifica su país de origen; y el apartado “Keyboard Layout” especifica el idioma del teclado.
Si por algún motivo alguno de estos apartados se encuentra configurado de manera incorrecta, por favor, desplácese usando las techas de flecha arriba y abajo.
Para entrar en cualquiera de las 3 opciones, posiciónece sobre de la opción que desee configurar y presione Enter. Una vez dentro, desplácese usando las teclas de flechas que se requieran usar y edite los valores. Una vez que acabe, presione Enter para salir de esa configuración y volver otra vez a la pantalla anterior.
Cuando esté listo, posiciónece sobre “The settings are correct” y presione Enter.
Paso 24: Ahora, presione Enter de nuevo.
Paso 25: Espere. Dentro de unos segundos, saldrá una pantalla que dirá “Please insert the following disk in drive A: Setup Disk #2”. Lo que nos indica, es que agreguemos el disco 2. Para ello, ubique los menús en la parte superior de esa ventana. Ubique el menú llamado “Dispositivos”, y acceda al submenú llamado “Montar Disquet”.
Paso 26: Ahora, acceda a la opción “Imagen Disquete…”. Se le abrirá una nueva ventana. Haga clic sobre la opción “Agregar” (ubicado en la parte superior de esa nueva ventana).
Paso 27: Ingrese a la carpeta “MS-DOS 6.22” que descargó de esta guía, y seleccione el archivo “Disk 2.img”, y a continuación, haga clic en “Abrir”.
Paso 28: Seleccione ese disco que agregó, y a continuación, haga clic en “Seleccionar”.
Paso 29: Ahora, presione Enter en la pantalla azul.
Paso 30: Espere unos momentos. Se quitará el anterior recuadro, y aparecerá uno similar, con el texto “Please insert the following disk in driver A: Setup Disk #3”. Para ello, realizaremos el mismo procedimiento que con el disco 2.
Paso 31: Ahora, nos saldrá una pantalla con el texto “Remove disks from all floppy disk drivers”. Lo que nos indica, es que removamos los disquetes. Para ello, acceda al menú “Dispositivos” y haga clic en la opción “Desmontar Disquete”.
Paso 32: Ahora, presione Enter.
Paso 33: Saldrá otra pantalla que le indicará que se ha instalado MS-DOS 6.22 con éxito en su computadora. Haga clic en Enter de nuevo.
Paso 34: Espere. Cuando vea un texto que diga “done”, haga clic en el menú “Máquina”, y haga clic en la opción “Reiniciar”. Le saldrá una ventana de confirmación; haga clic en el botón “Reiniciar”.
Paso 35: Espere. Cuando vea el texto “C:\>_”, podremos continuar: diríjase al menú “Dispositivos”, y seleccione la opción “Montar Disquet”, y dentro de ella, seleccione la opción “Imagen Disquet…”.
Paso 36: Se le abrirá la misma ventana con la que ya ha trabajado antes. Haga clic en la opción “Agregar”, y luego, vaya a la carpeta “Windows 3.1” (donde se encontraba igualmente “MS-DOS 6.22”), y ábrala. A continuación, seleccione el archivo “Disk1.img”, y de clic en “Abrir”.
Paso 37: Seleccione “Disk1.img” y haga clic en “Seleccionar”.
Paso 38: Ahora, introduzca esta siguiente ruta en “C:\>”: C:\DOS\SMARTDRV.EXE /X y presione Enter.
Paso 39: Le saldrá un texto algo largo con información de distintos discos. Ahora tendrá que reiniciar la máquina: haga clic en el menú “Máquina”, y cliquee la opción “Reiniciar”. A continuación, le saldrá una ventana de confirmación. Haga clic en el botón “Reiniciar”.
Paso 40: Espere. Ahora, nótese que cuando inicie MS-DOS, verá la ruta introducirse automáticamente en su línea de comandos. Ahora, ingrese “A:” y presione Enter.
Paso 41: Nótese que ha cambiado de “C:\>” a “A:\>”. Introduzca el comando “SETUP” y haga clic en Enter.
Paso 42: Presione de nuevo Enter.
Paso 43: Ahora, presione otra vez Enter para entrar en el modo Express Setup.
Paso 44: Nos abrirá una pantalla que nos pide que insertemos el disco 2. Para ello, iremos al menú “Dispositivos”, y entraremos a la opción “Montar Disquete”, y le daremos a “Imagen Disquete…”.
Paso 45: Como agregamos el disco 1 al inicio, agregaremos el 2: de clic sobre el botón “Agregar”, seleccione “Disk2.img” y de clic a “Abrir”. Ahora, selecciónelo y haga clic en “Seleccionar”.
Paso 46: Ahora, haga clic en Enter.
Paso 47: Repita este paso una vez más, pero ahora con el disco 3 (“Disk3.img”).
Paso 48: Ahora, entraremos en el asistente principal de la instalación de Windows 3.1: introduzca en el apartado “Name”, introduzca su nombre completo, y en el apartado “Company”, introduzca el nombre de su empresa en el caso de que se use para fines de negocios. Cuando esté listo, haga clic en “Continue”.
Paso 49: Le saldrá una ventana de verificación. Verifique que los valores que introdujo sean correctos, si sí, haga clic en “Continue”, de lo contrario, haga clic en “Change” y vuelva al paso 48.
Paso 50: Espere. De pronto, le saldrá una ventana que le pedirá el disco 4, con un texto que dice “Microsoft Windows 3.1 Disk #4”. De la misma manera que insertó el disco 1, 2 y 3, ahora inserte el 4.
Paso 51: Espere. Ahora le pedirá el disco 5, con un texto que dice “Microsoft Windows 3.1 Disk #5”. Repita el procedimiento del paso anterior.
Paso 52: Espere. Ahora, le pedirá el disco 6, con un texto que dice “Microsoft Windows 3.1 Disk #6”. Repita el procedimiento del paso anterior.
Paso 53: Ahora, le pedirá ingresar una impresora. Si es que en realidad usted cuenta con una, asígnela. Para fines de esta guía, pondremos “No Printer Attached”, y le daremos a “Install”.
Paso 54: Espere. Ahora, le aparecerá una ventana. Seleccione la opción “MS-DOS Editor”, y haga clic en “OK”.
Paso 55: Ahora, le aparecerá una ventana que le pregunta que si quiere realizar un tutorial para aprender a usar Windows 3.1. Para fines de esta guía, le daremos en la opción “Run Tutorial”.
Paso 56: Se saldrá de Windows y entrará en MS-DOS. Teclee “WIN” y presione Enter.
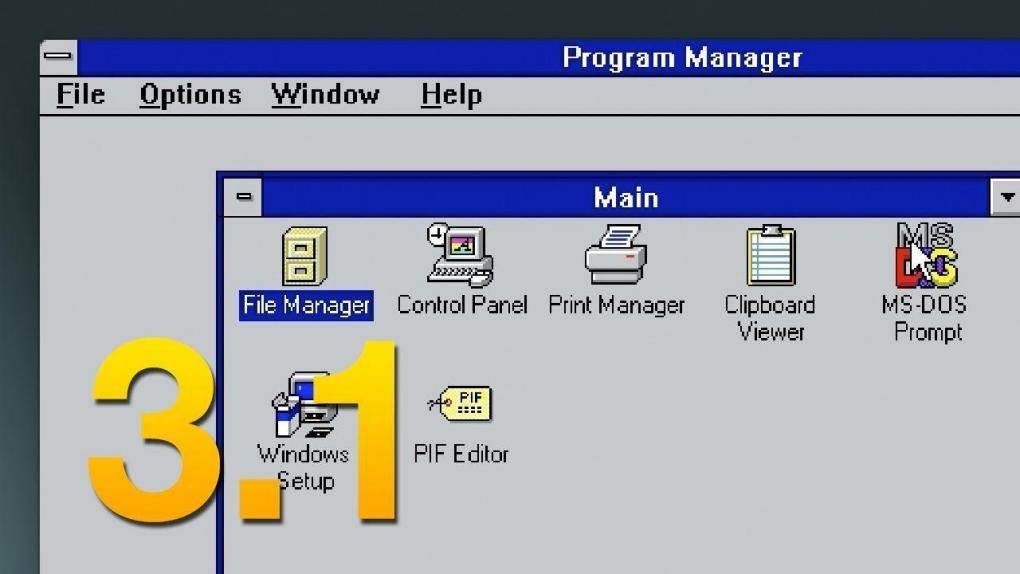
Paso 57: Espere a que cargue Windows 3.1, y así habrás completado esta guía sobre cómo instalar Windows 3.1.
¡ENHORABUENA! Ahora ya sabes cómo instalar Windows 3.1
Puedes ver nuestros posts más recientes en nuestra página inicio del blog. Danos like en nuestra página de Facebook para que no te pierdas ninguna novedad. ¡BUEN DÍA Y SALUDOS POR PARTE DE NUESTRO EQUIPO!