In this post we will teach you how to how to install windows 98, a very old Microsoft system in a virtual machine, using VirtualBox. ENTERS!
WE START:
Welcome to another post. This time I come to present a VERY WELL explained and VERY COMPLETE installation guide on how to install Windows 98 in VirtualBox. I originally made it for a school job (which asked me to make this guide so clear that an adult who knows nothing about technology could understand how to install Windows 98), but since I love all of you, I decided to share it. So let's go!
How to install Windows 98 on VirtualBox
Welcome to this installation guide. Before you start, you will need to have the program Sun xVM VirtualBox in its version 3.0. May check the following link to download it in case you don't have it installed.
You must also have the necessary files for this tutorial.
The files are in RAR format, which is a compressed archive format. You must have a special program to be able to decipher them.
Now we can continue with the guide to install Windows 98.
Create the virtual machine
To start installing Windows 98, we will first create our virtual machine:
Step 1: Open the program Sun xVM Virtual Box, which will be found on your computer desktop.
Step 2: Click on the "New" icon, located at the top left of the program:
Step 4: Click Next".
Step 5: A window will open for you. You will see that there are different sections:
- Name: enter the name of the system to install. In this case, the field goes with "Windows 95".
- Type: Leave that section as is (on Microsoft Windows).
- Version: pull down the menu and choose the option "Windows 95".
Then click "Next".
Step 6: On the next slide, it asks you for the memory size. Edit the value and enter 256 MB, then click "Next".
Step 7: Then, check the box "Boot Hard Disk (Primary Master)", and select the option "Create new Virtual Disk".
Step 8: A pop-up window will open for you. Click Next".
Step 9: Select the "Dynamic Expansion Storage" option, and click "Next."
Step 10: Select the location of the file. By default, that value is "Win95", but if you want to change it, you can. In the field called "Size (S)", it is recommended to set the value between 2.00 GB and 10 GB, but it will depend on the task to which that computer is assigned. When you're ready, click "Next."
Step 11: Click on "Finish", then, in the same way, on "Finish".
Step 12: The window will close. You can see that on the left side of the program a new section has been added. Select it.
Step 13: After that, go to the “Configuration” section (it is found in the upper left part of the program).
Step 14: Enter into the "System" menu, and in the "Boot order:" section, locate the floppy option, select it and double-click the downward-pointing arrow.
Step 15: Now, uncheck the floppy option.
Step 16: Then, go to the "Screen" option, and in the "Video memory" section, edit the value and assign it 40 (it is on the right side of your screen).
Step 17: Now, we go to the option of "CD / DVD-ROM", and we mark the box "Mount the CD / DVD drive", and then click on "ISO Image File".
Step 18: Click on the folder icon on the right.
Step 19: A new window will open for you. Click on "Add" (upper left corner, and then go into the folder you unzipped, and select the file "Windows 98 SE Spanish Original.iso".
Step 20: Then click "Open."
Step 21: It will be added. Now click on “Select” (make sure the file is selected.
Step 22: Now, go to the "Network" option, and in the "Connected to:" section, select the "Internal Network" option.
Step 23: Now, click "OK" (bottom right).
Step 24: The window will close. Then click on the green arrow button "Start".
Step 25: A window will pop out. Press the down arrow key to select the "Boot from CD-ROM" option.
Step 26: Now go to the option "Start Windows 98 Installation with CD-ROM", and press Enter.
Step 27: Wait. You will get a blue screen. Press enter.
Step 28: Press Enter again.
Step 29: Again, hit Enter.
Step 30: Did you insert the disc “Windows 98 SE Spanish Original.iso” correctly as mentioned in step 19? If yes, press Enter, if not, close the window and go back to step 19.
Step 31: You will see the screen from step 25 again. Press the down arrow button, and press Enter.
Step 32: Now hit Enter.
Step 33: Wait. Now drive C is being formatted. When done, you will see a blue screen. Press enter.
Step 34: A flash will occur. And you will enter the main installation of Windows 98. Read the instructions and then press “Continue”.
Step 35: Wait. Now, leave the default value at “C: \ WINDOWS”, and click “Next”.
Step 36: Wait. Now, leave the box "Typical", and click on "Next".
Step 37: Leave the box that says "Install the most common components (recommended)" and click on "Next".
Step 38: Now, configure the 3 sections that you will see on that next screen. When you're ready, click "Next."
Step 39: Select your country of origin, and click "Next".
Step 40: Again, click "Next."
Step 41: Windows 98 file copy will start; wait, this may take around 10 minutes.
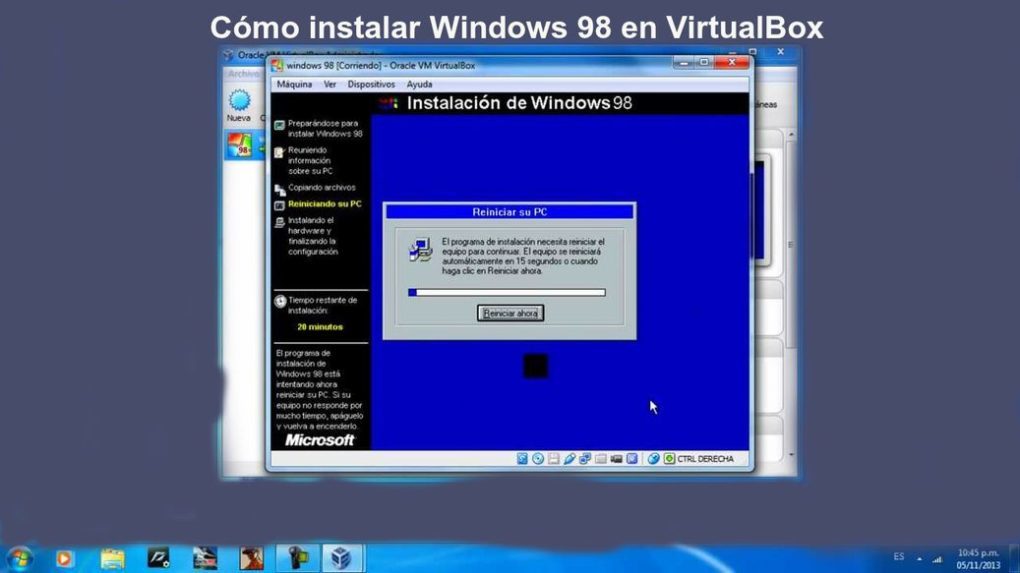
Step 42: When done, the virtual machine will restart. Wait for Windows to start. In case it asks you for options from the CD-ROM boot menu, now select option 1, and click Enter; if not, wait until the second part of the Windows 98 installation starts.
Step 43: Now, a user information box will appear, fill in the two sections. When you're ready, click "Next."
Step 44: Now, read and accept the contract by clicking on the "I accept the contract" box. When you're ready, click "Next."
Step 45: Now, you will need to enter an activation license. Enter "CMGRR-XCBMG-4P8TB-DR9FW-62PFB”. Note that the "-" is the spacing of each box. When you're ready, click "Next."
Step 46: Now, click "Finish."
Step 47: Please wait a few minutes. Loading processes will be displayed, and when they are done, your virtual machine will restart.
Step 48: The CD-ROM start menu will appear again, position yourself on the first option and press Enter.
Step 49: Wait. When Windows starts and the "Date and Time Properties" window has loaded, configure the sections that are shown. When you're ready, click "Close."
Step 50: Please wait a few minutes. Windows 98 will do multiple system loading processes. When done, your virtual machine will reboot.
Step 51: When your machine restarts, you will see the CD-ROM boot menu again. Position yourself on option 1 and press Enter.
Step 52: Wait. When Windows finishes starting up, it will ask for a username and password. This is to protect your system from unauthorized persons who want to turn on your computer and steal or pry your data. Please configure the sections. When you're ready, click "OK."
Step 53: Wait. When you start Windows 98, a window will appear that says “Welcome to Windows 98”, introducing you to the new enhancements to it.
Step 54: Close that window by clicking "Close".
Step 55: Now, click on the Windows start button (bottom left).
Step 56: Then, go to the “Settings” menu, and then go to the “Control Panel” option.
Step 57: Now, look for the option "Network" (you have computers connected to each other), and access it.
Step 58: A window will open for you. Click the "Add ..." button, then double-click "Protocol".
Step 59: Another window will open for you. Select the "Microsoft" option (on the left side), and select the "NetBEUI" option (on the right side, when you enter "Microsft"). When you're ready, click "OK."
Step 60: The above window will close. Now, click on "Add ..." from the previous window.
Step 61: The previous window will close. Click "OK" from the only Network window left.
Step 62: Now, a window will open that says “Copying files…”, prompting you for a disk called “Windows 98 SECOND EDITION CD-ROM”. Click "OK."
Step 63: A window will open for you. Asking you for the disk path. To find out the path, on your Windows desktop, there is an application that says "My Computer", access it.
Step 64: Now, take a look at the first row of programs, on the right side. See the prefix it has (is it “E:”? Or is it “D:”?). Take it in mind.
Step 65: Close "My Computer", and return to the window where the path is requested. Over-type the path, and when you're ready, click "OK."
Step 66: Now, the computer will ask you to restart the system. But before we do that, we must eject the installation disc: locate the menus that are in the upper part of your window. Access the "Devices" menu, and then click "Unmount CD / DVD-ROM", and restart your computer after that.
Step 67: Wait for Windows 98 to start again. When that happens, you have completed this guide on how to install Windows 98.
CONGRATULATIONS, YOU'RE FINISHED! Now you know how to install Windows 98.
Until another post!
You can see our most recent posts on our page start from the blog. Like us on our Facebook page so you don't miss any news. GOOD MORNING AND GREETINGS FROM OUR TEAM!